Share development environments
You can use Cloudflare’s reverse proxy and Cloudflare Tunnel to share local development environments with team members or customers across the Internet.
Instead of pointing DNS records to the external IP of a web service, you can connect that service to Cloudflare’s network using Cloudflare Tunnel. Cloudflare Tunnel relies on a lightweight service, cloudflared, that you run in your infrastructure. cloudflared makes outbound-only connections to Cloudflare’s network, so that you do not need to open holes in your firewall.
You can use Cloudflare Tunnel to quickly share projects you are working on with team members without a virtual private network (VPN). In this example, you can use Cloudflare Tunnel to give users a preview of a new website. At the end, as an optional step, you’ll be able to add an Access policy to only allow certain people to reach the site.
This tutorial covers how to:
- Start a secure, outbound-only, connection from an application running locally on a Mac laptop
- Give that application a hostname where users can reach the resource
- Optionally require a simple login to reach the application with Cloudflare Access
Time to complete:
15 minutes
Before you start
- Add a website to Cloudflare
- Change your domain nameservers to Cloudflare
- Enable Argo Smart Routing for your account
Install cloudflared
In this example, the new website is a Hugo site. Hugo, a static site generator, provides a built-in server that can be used for testing changes. That server is available at localhost:1313 - an address only available currently on the same machine as the server.
To share this work-in-progress, start by downloading and installing the Cloudflare Tunnel daemon, cloudflared. On Mac, you can do so by running the following brew command. If you do not have Homebrew, follow the documentation to install it.
$ brew install cloudflare/cloudflare/cloudflared
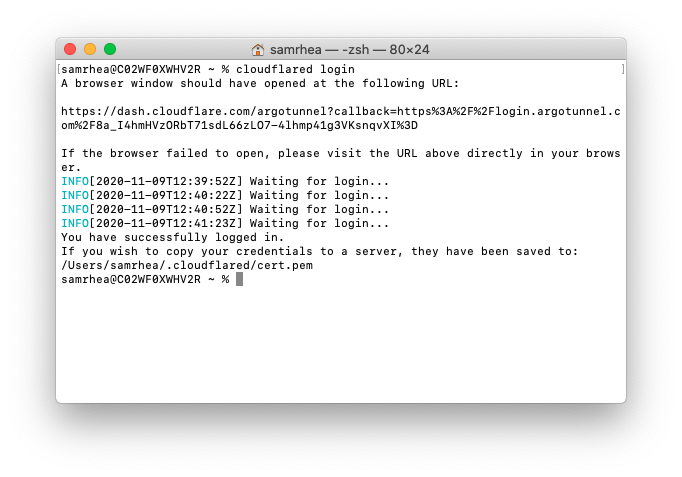
Once installed, run the following command in your Terminal to authenticate this instance of cloudflared into your Cloudflare account.
$ cloudflared login
The command will launch a browser window and prompt you to login with your Cloudflare account. Choose a website that you have added into your Cloudflare account. The website selected does not need to be the website where the environment will be made available.
Once you click one of the sites in your account, Cloudflare will download a certificate file to authenticate this instance of cloudflared. You can now use cloudflared to control Cloudflare Tunnel connections in your Cloudflare account.
Create a Tunnel
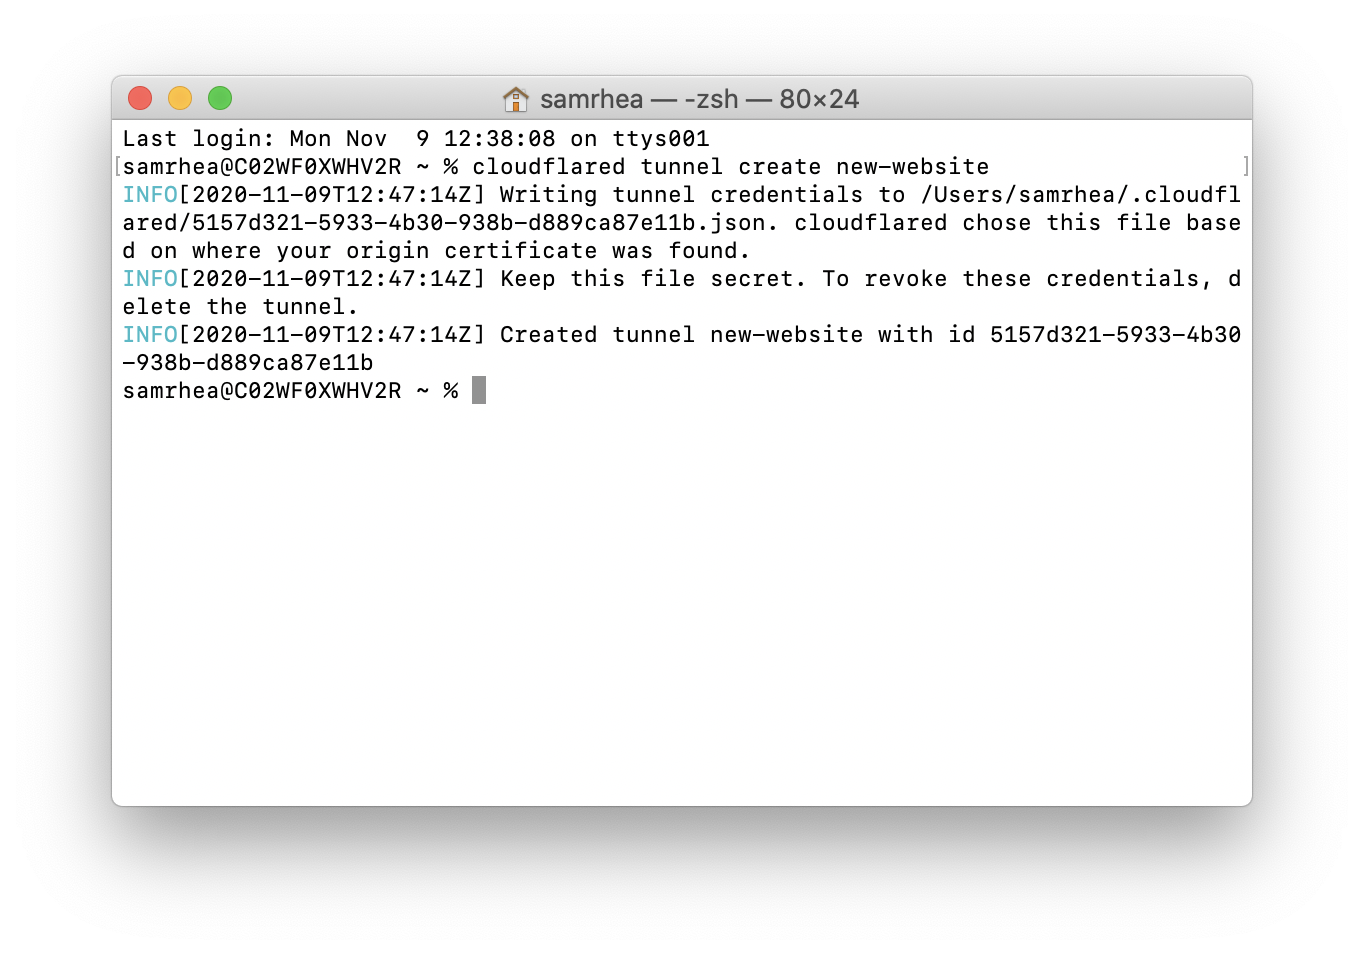
You can now create a Tunnel that will connect cloudflared to Cloudflare’s edge. You’ll configure the details of that Tunnel in the next step.
Run the following command to create a Tunnel. You can replace new-website with any name that you choose.
$ cloudflared tunnel create new-website
Cloudflare will create the Tunnel with that name and generate an ID and credentials file for that Tunnel.
Configure cloudflared
You can now configure cloudflared to route traffic to your local development environment. You can use a configuration file to do so, which makes it easier to start cloudflared in the future.
By default, cloudflared expects the configuration file at a specific location: ~/.cloudflared/config.yml. You can modify this location if you want. For this example, we’ll keep the default. Create or edit your configuration file using a text editor.
$ vim ~/.cloudflared/config.yml
The url value is the destination where the new website is available locally. The tunnel and credentials-file value can be copied from the output of the last command where you created the Tunnel.
url: http://localhost:1313
tunnel: 5157d321-5933-4b30-938b-d889ca87e11bcredentials-file: /Users/username/.cloudflared/5157d321-5933-4b30-938b-d889ca87e11b.json Run Cloudflare Tunnel
At this point, you have created and configured your Cloudflare Tunnel connection. You can now run the Tunnel to create connections to Cloudflare’s edge. Those connections will not respond to traffic, yet. You’ll add DNS records in the next step to share the resource across the Internet.
$ cloudflared tunnel run
Create DNS records
You can now route traffic to your Tunnel, and on to your local server, using Cloudflare DNS. Visit the Cloudflare dashboard, select a website, and click on the DNS tab.
Click Add record and choose CNAME. In the Name field, add the name of the subdomain of your new site. In the Content field, paste the ID of your Tunnel created earlier and append cfargotunnel.com.
5157d321-5933-4b30-938b-d889ca87e11b.cfargotunnel.com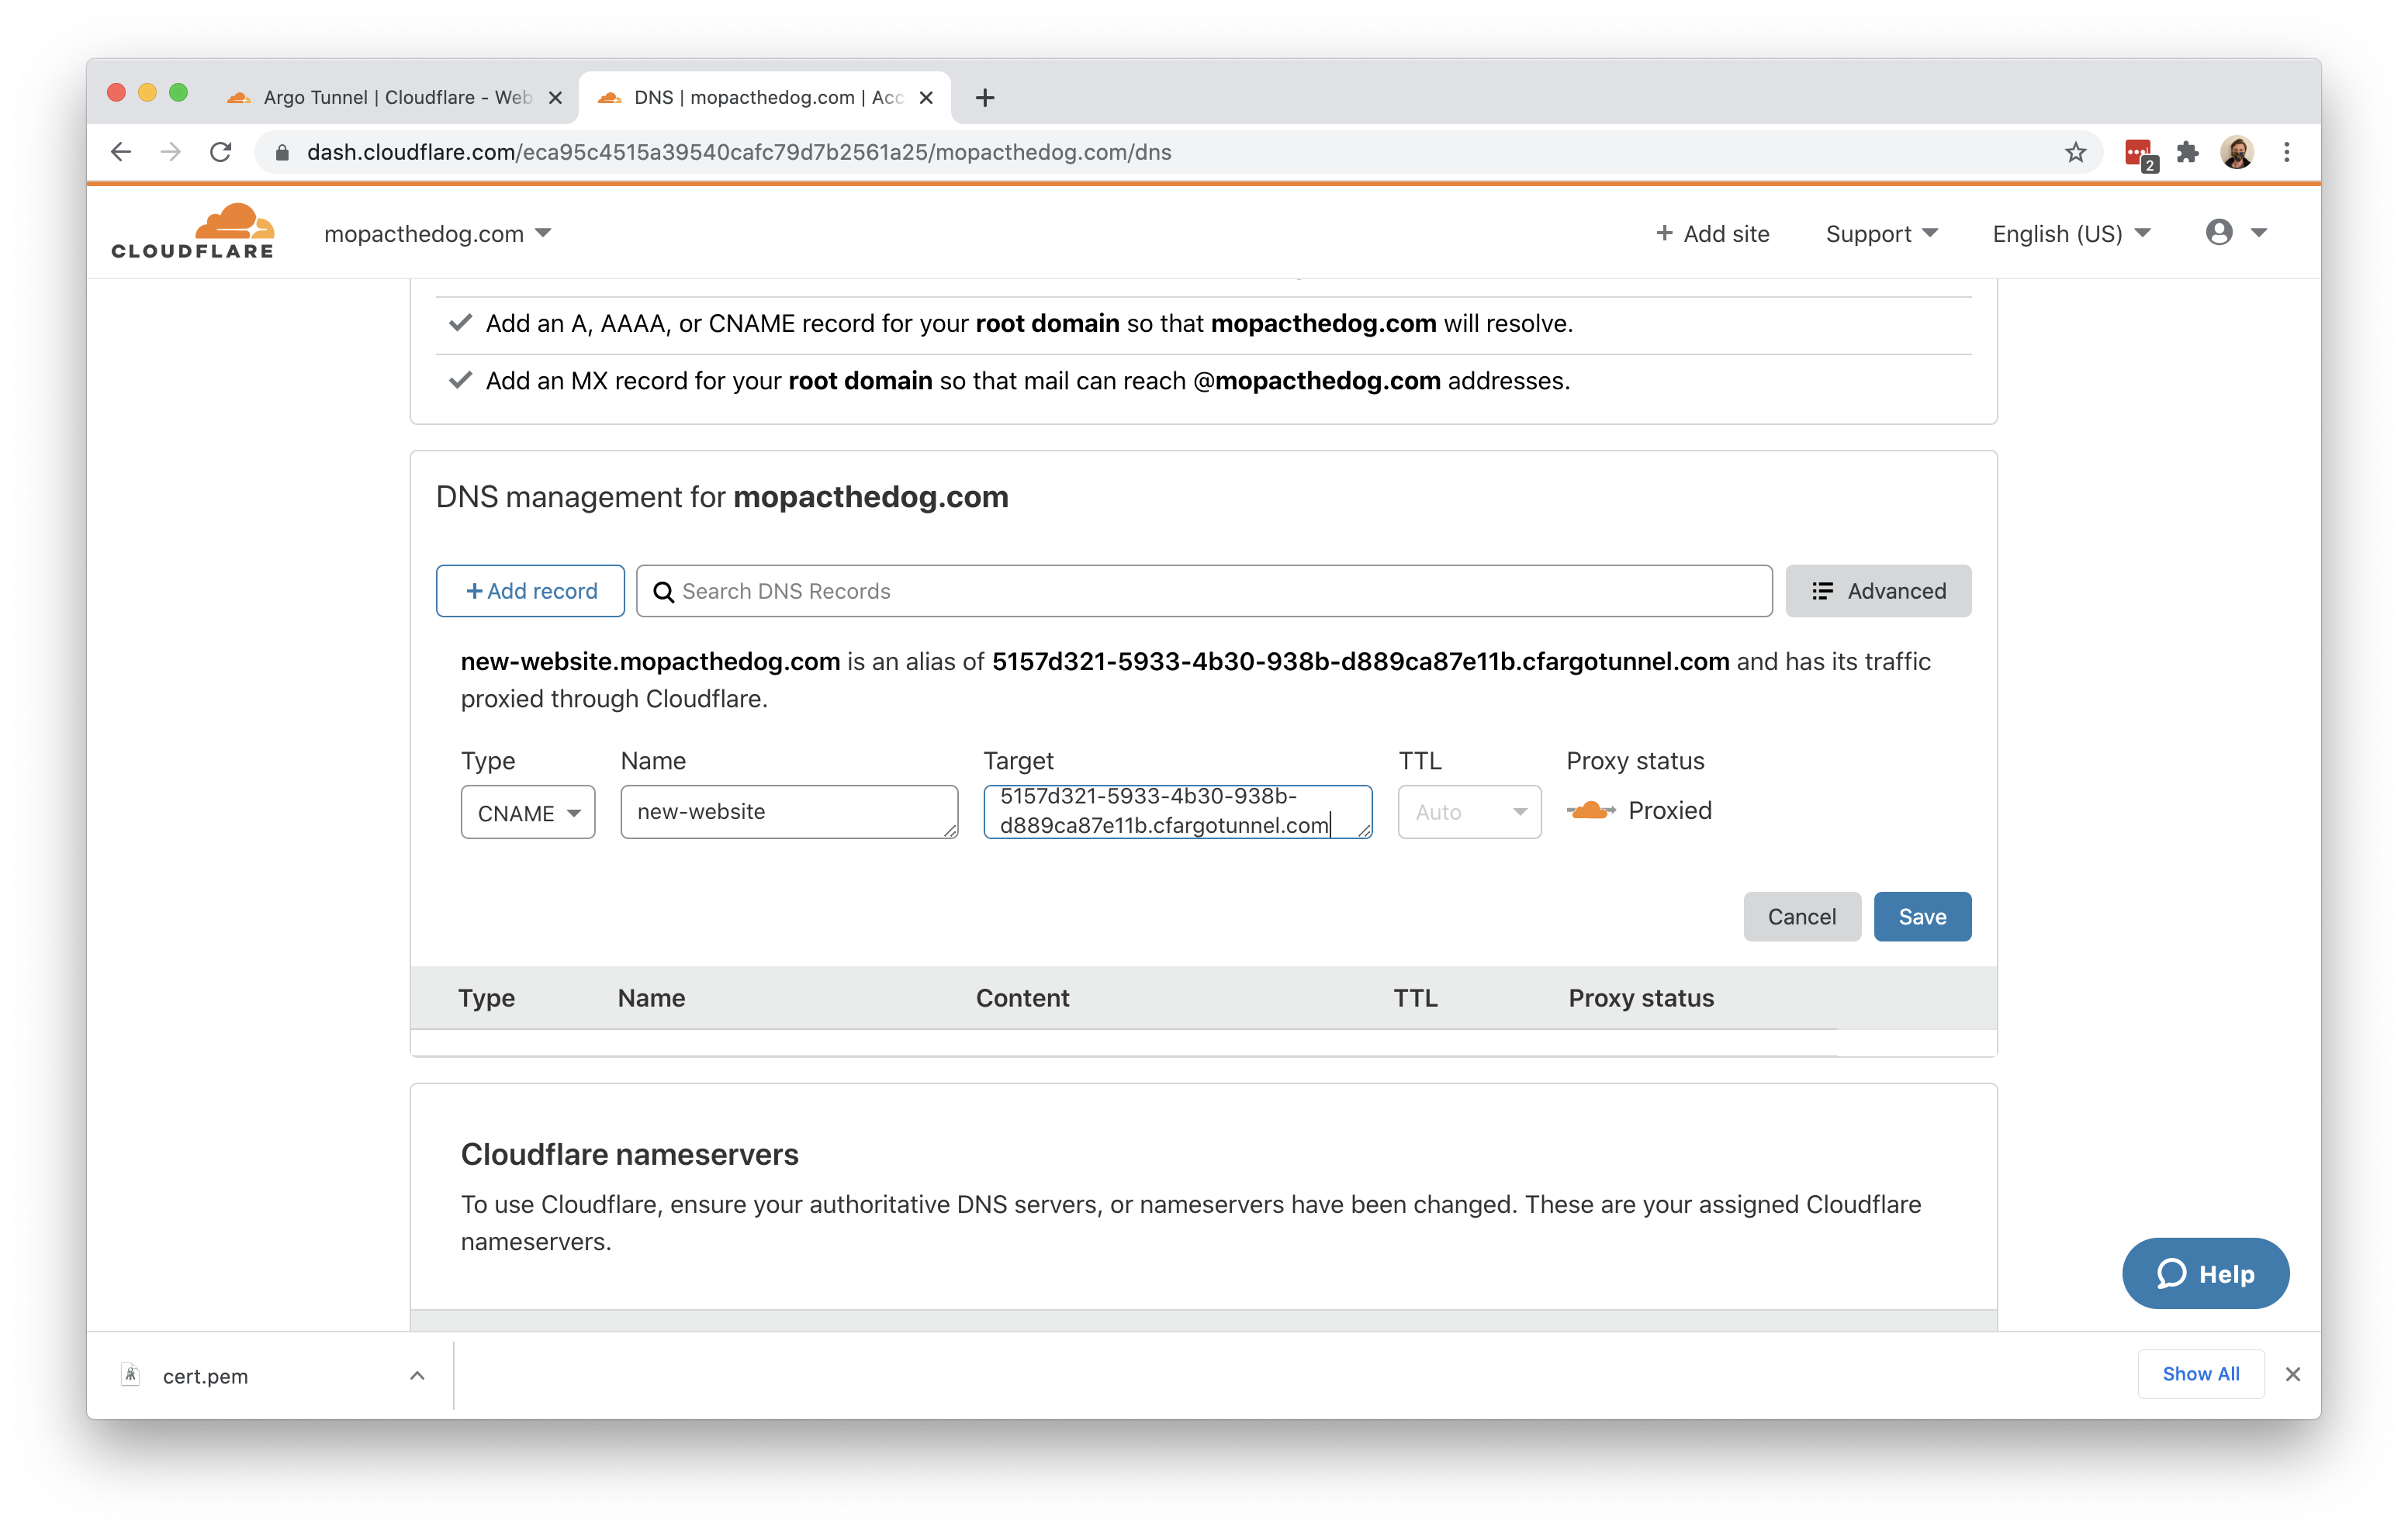
Once saved, you can share the subdomain created and visitors can reach your local web server environment.
Alternatively, you can create a DNS record from cloudflared directly. To do so, run the following command, replacing the UUID value and DNS record with your own equivalents.
$ cloudflared tunnel route dns 5157d321-5933-4b30-938b-d889ca87e11b new-website.mopacthedog.com
Optional: Add a Zero Trust policy
When you create the DNS record, any visitor will be able to view that new site. You can restrict the audience to certain users by adding a rule in Cloudflare Access. You can also build this Access rule before creating the DNS record so that the site is never accessible to the rest of the Internet.
Before you build the rule, you’ll need to follow these instructions to set up Cloudflare Access in your account.
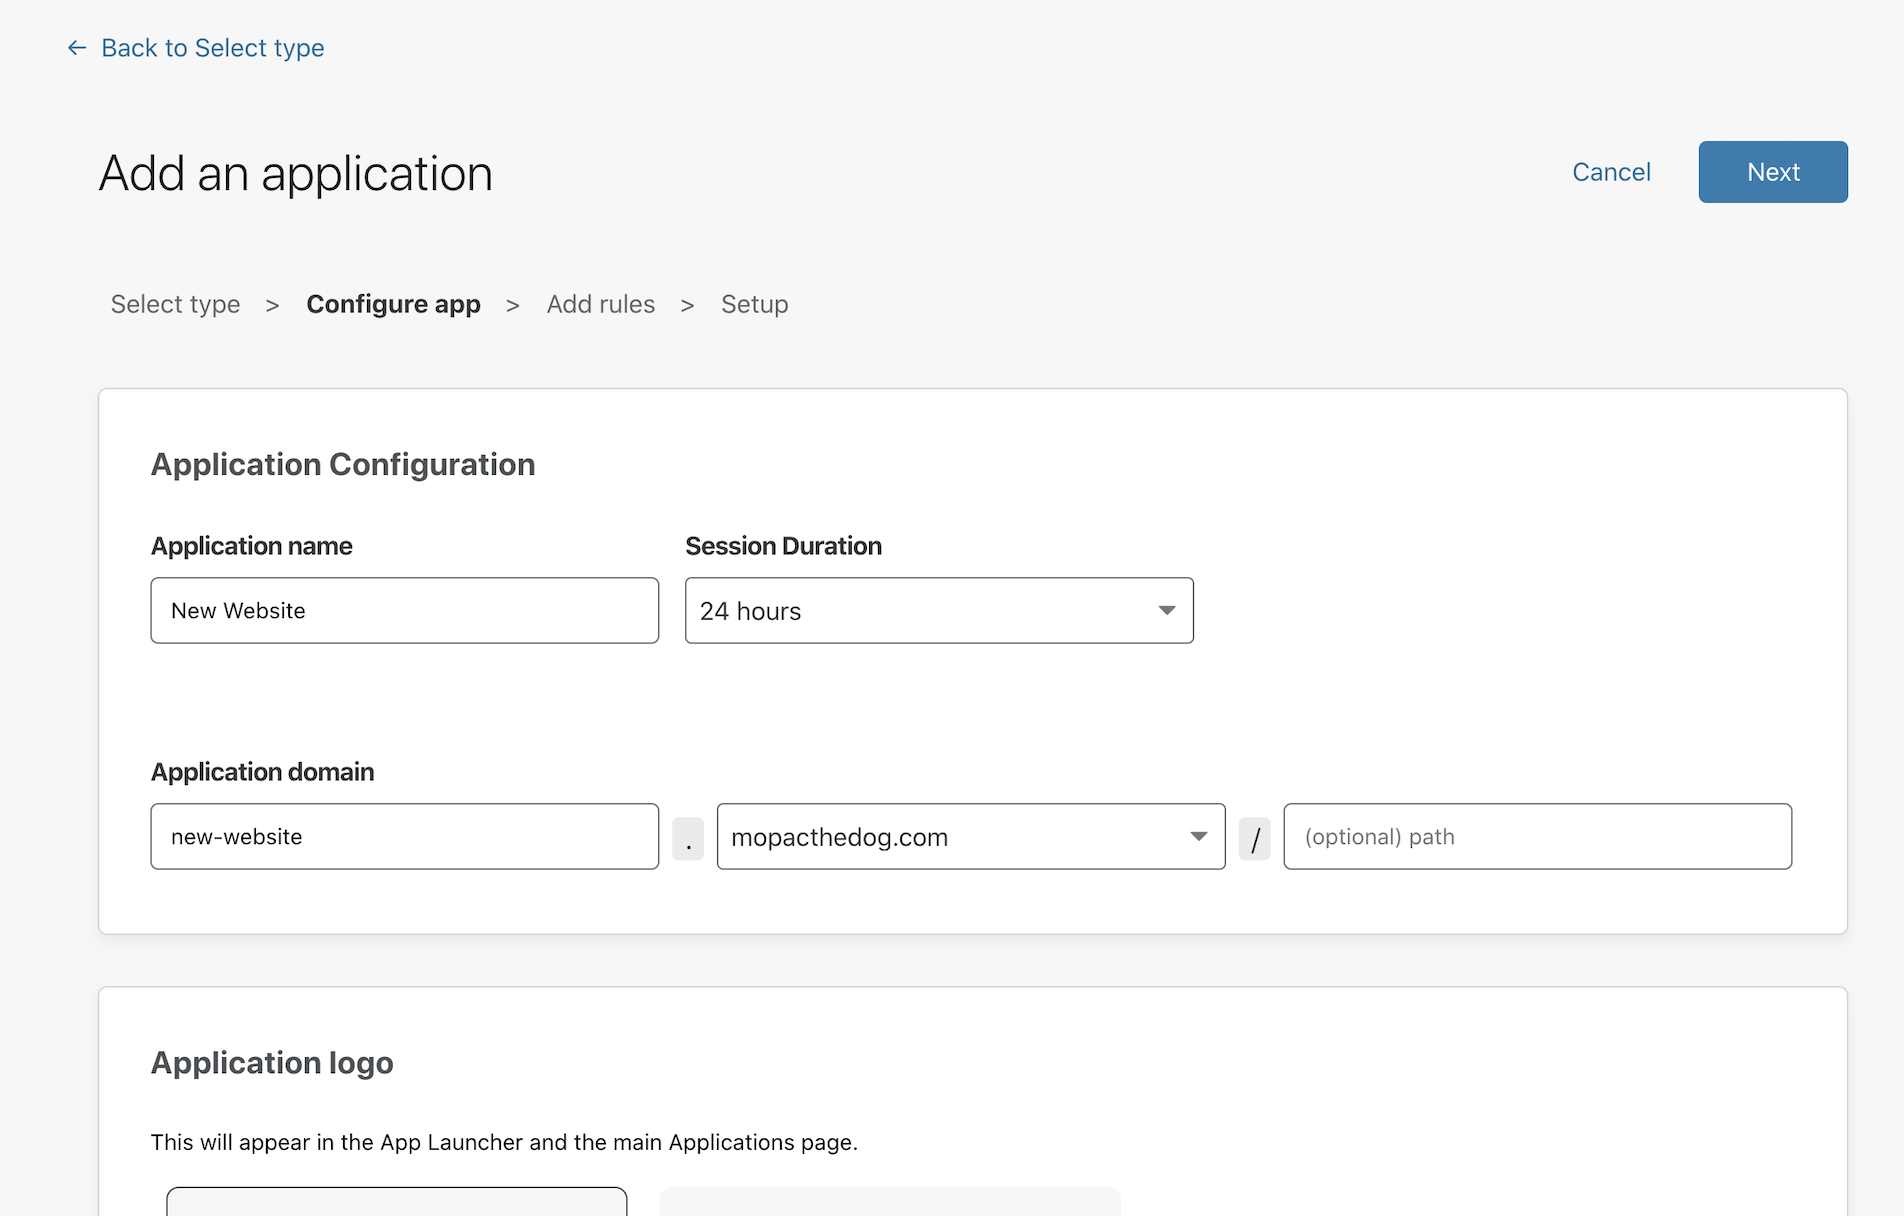
Once enabled, navigate to the
Applicationspage in Zero Trust.Click Add an application.
Choose self-hosted from the options presented.
In the policy builder, add the subdomain of your new DNS record that represents your Cloudflare Tunnel connection.
You can then add rules to determine who can reach the site.

Additional Materials
- You can use this model to share more complex development environments with other team members.