Filter DNS based on users and groups
Cloudflare’s DNS filtering solution can apply filters based on who is making the query. With those options, your team can apply different DNS filtering policies to different parts of your organization based on specific user identity or groups from your identity provider’s directory.
To apply these types of rules, you will need to deploy Cloudflare’s agent on the devices in your organization. Cloudflare’s agent will prompt users to login and will use the identity from that authentication to send DNS-over-HTTPS (DoH) queries that include the user identity. These types of policies can also run in-line with Cloudflare Gateway’s HTTP filtering rules.
This walkthrough covers how to:
- Build a DNS filtering rule that applies to a group of users
- Use DNS filtering rule precedence to allow some users to reach a destination
Time to complete:
10 minutes
Before you start
Allow a team to reach social media
Navigate to the Gateway section of Zero Trust and open the Policies page. Select the DNS tab; if you see two DNS tabs, select the one marked NEW. Click Create a DNS policy to get started.
This first rule will allow users of your marketing team to reach social media. Select DNS Content Categories and choose Social Media from the options.
Next, click +Add condition to add a second rule. In this rule, select User Group Names. You can also select individual user emails or group IDs, as well as DNS locations. Input the name of the group in your identity provider that should be allowed to reach social media.
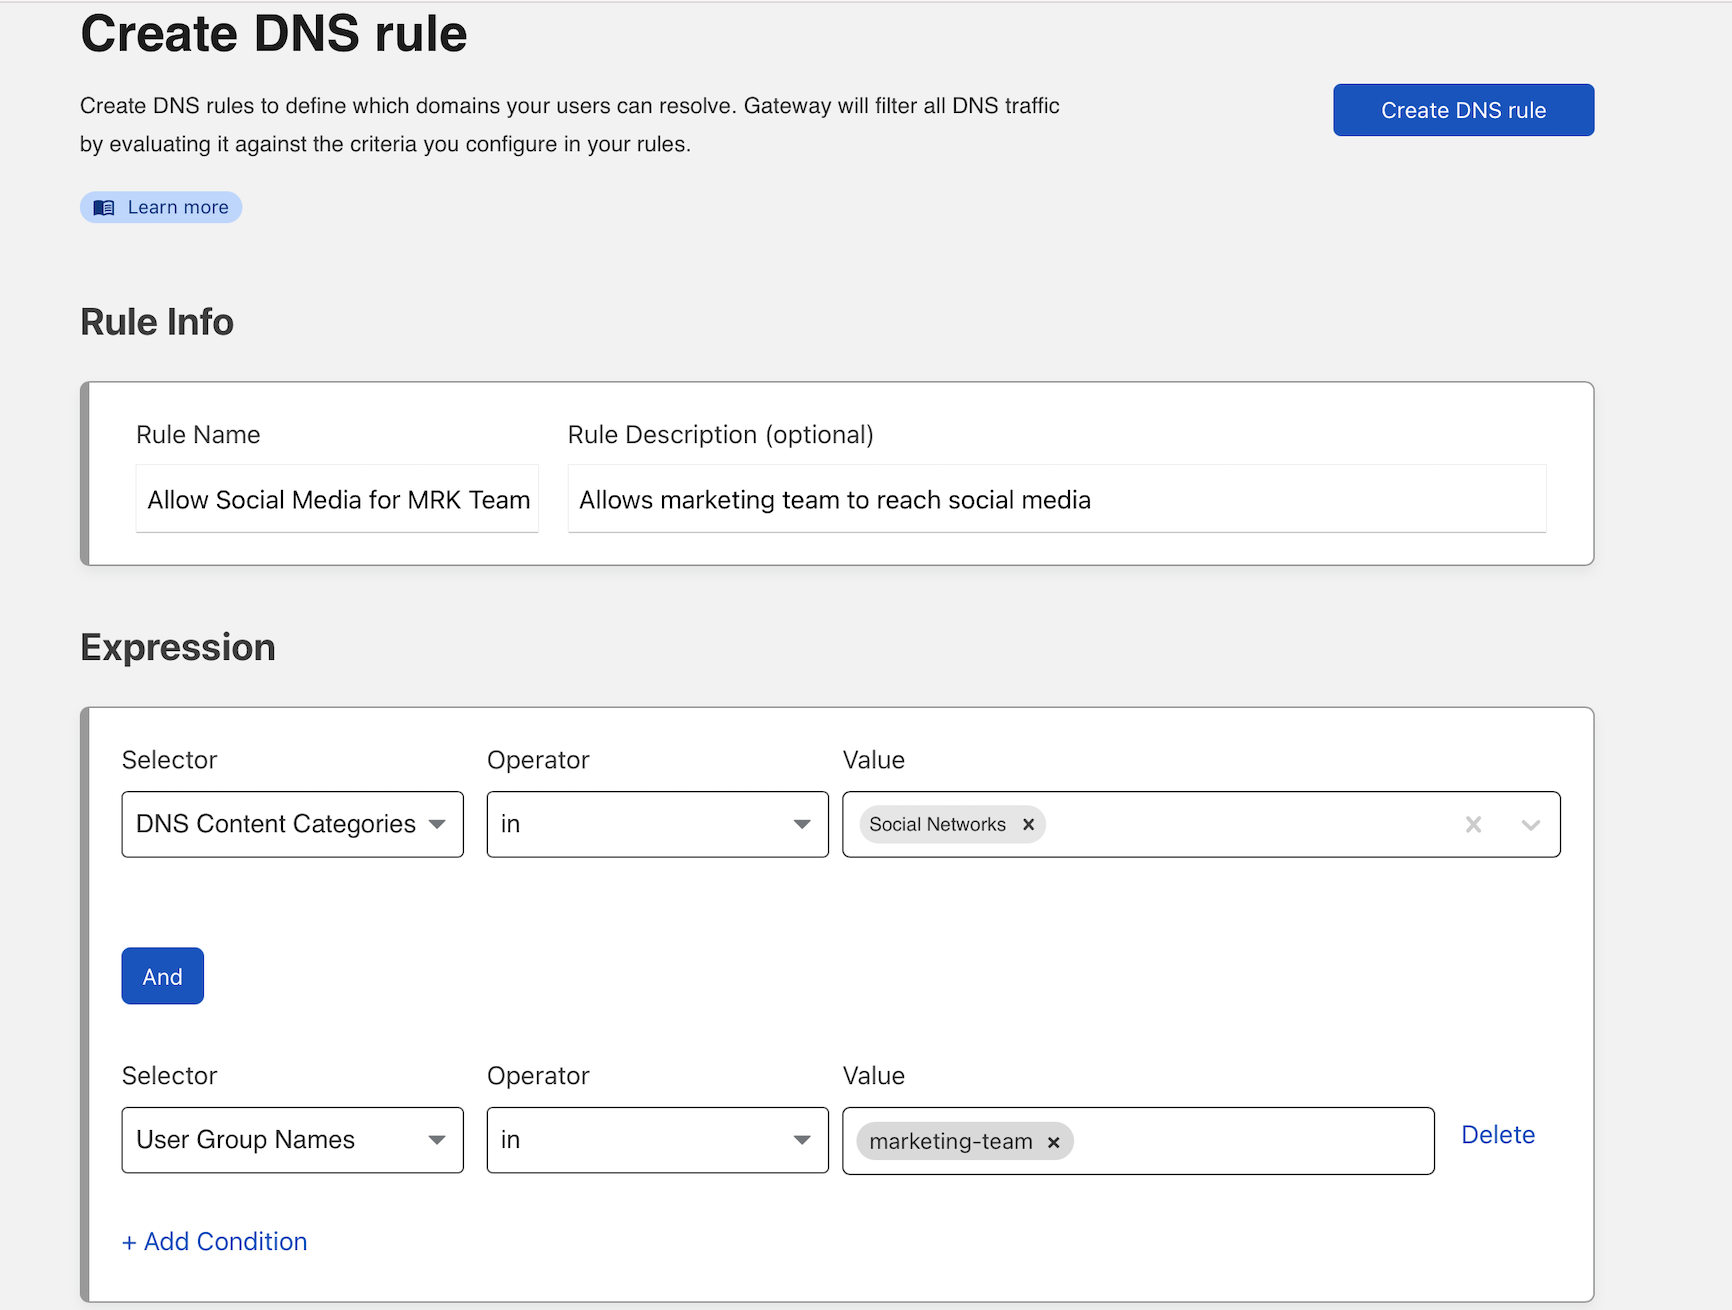
In the Action section, select Allow and save the rule at the top of the page.
Block social media for all other users
You can now build a rule that will block social media for the rest of your organization. Add a second rule and once again select DNS Content Categories and choose Social Media from the options.
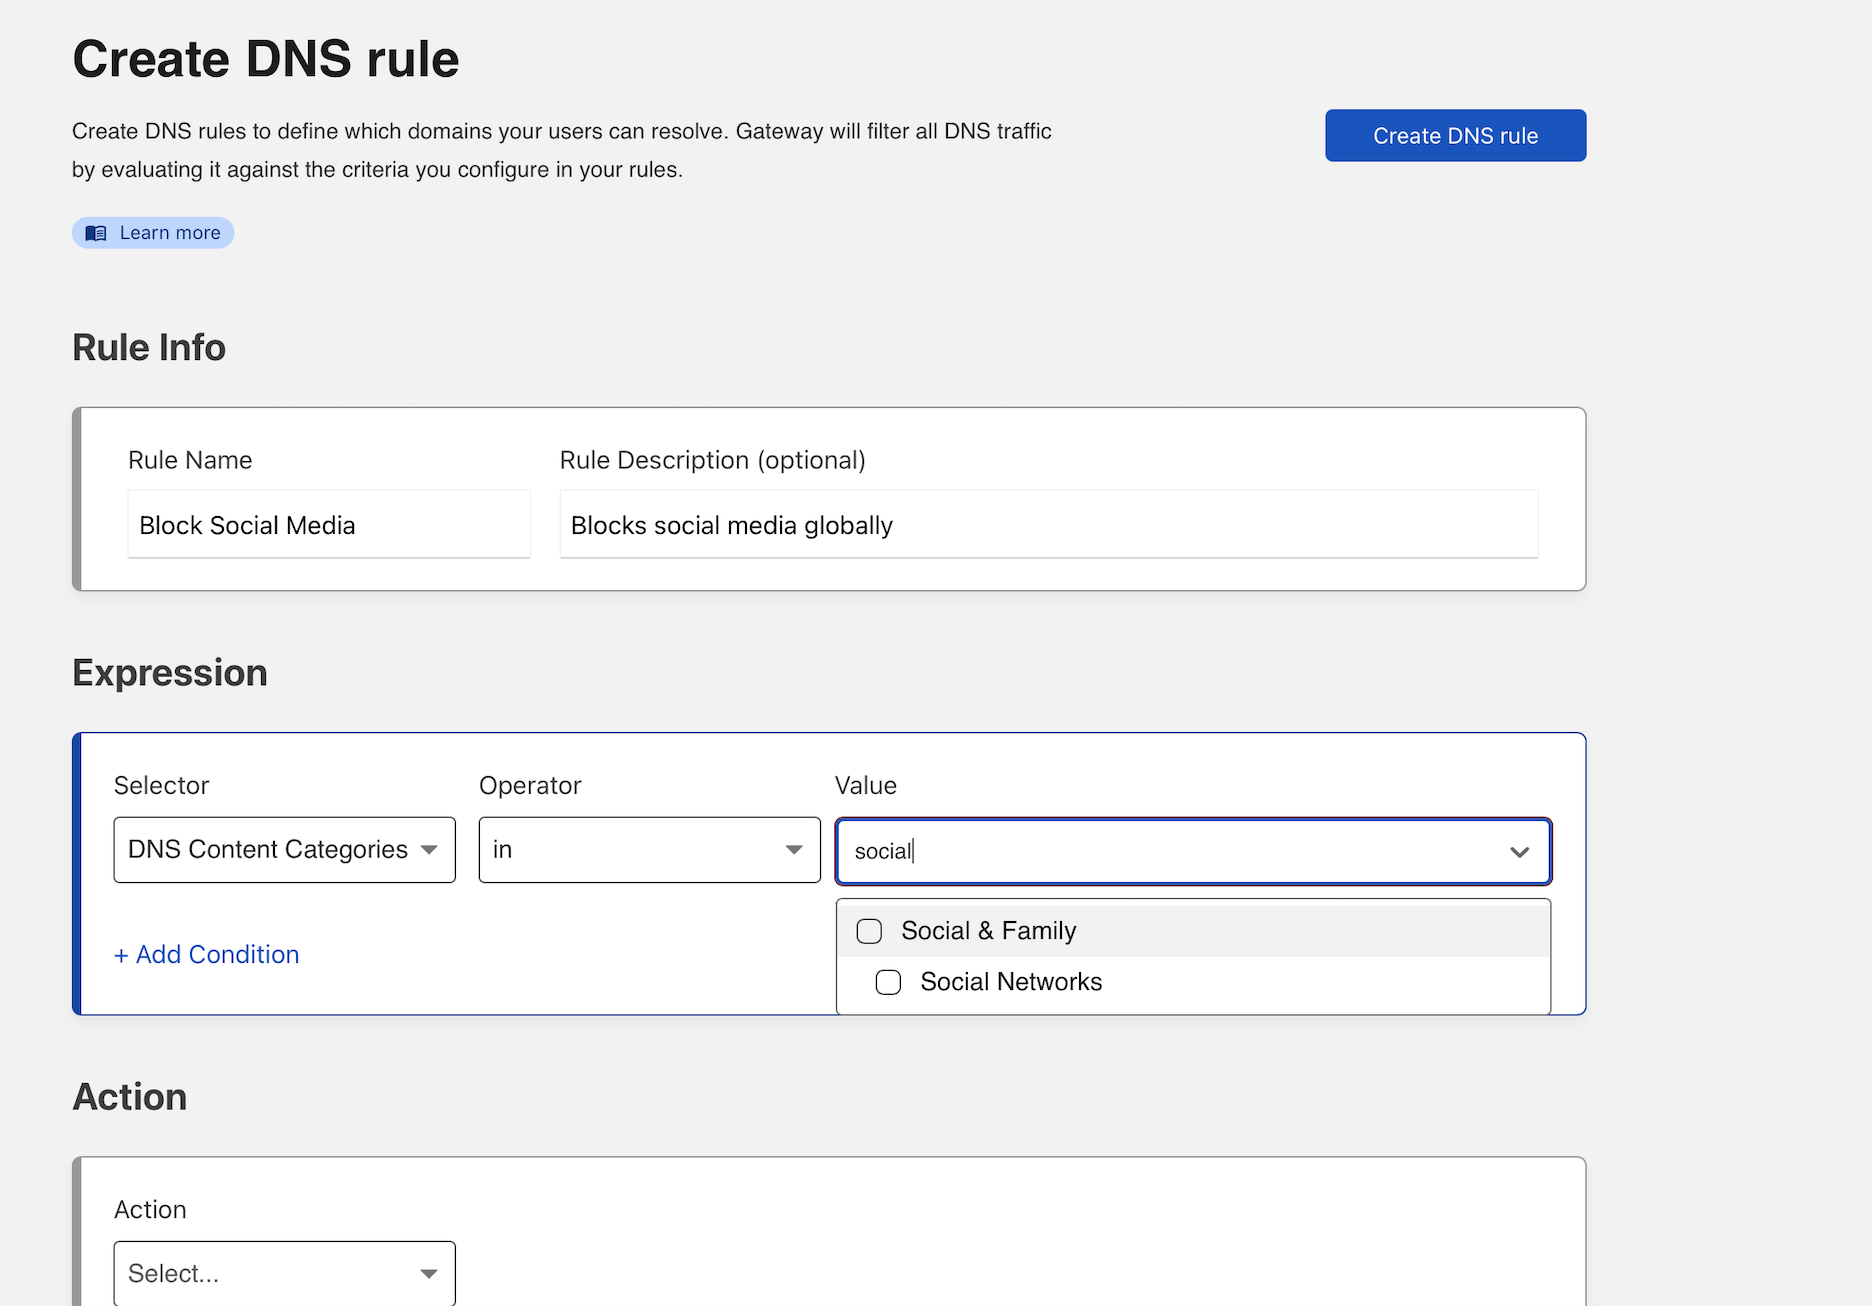
The rule does not need any additional criteria. This policy will apply to all DNS locations and users in your organization, regardless of how DNS queries are sent.
In the Action section, select Block and save the rule at the top of the page.
Once saved, ensure that the Allow rule has higher precedence than the Block rule. You can drag-and-drop rules as needed in the UI.

Rules are evaluated from top to bottom, so when the Allow rule is ranked first, users in the marketing group will be allowed to reach social media. Users who do not meet that criteria will have the next rule applied and will be blocked.