Block file uploads to Google Drive
You can use Cloudflare Gateway and the Cloudflare WARP client application to prevent enrolled devices from uploading files to an unapproved cloud storage provider.
This tutorial covers how to:
- Create a Gateway policy to block file uploads to a specific provider
- Enroll devices into a Zero Trust account where this rule will be enforced
- Log file type upload attempts
Time to complete:
10 minutes
Create a Gateway HTTP policy
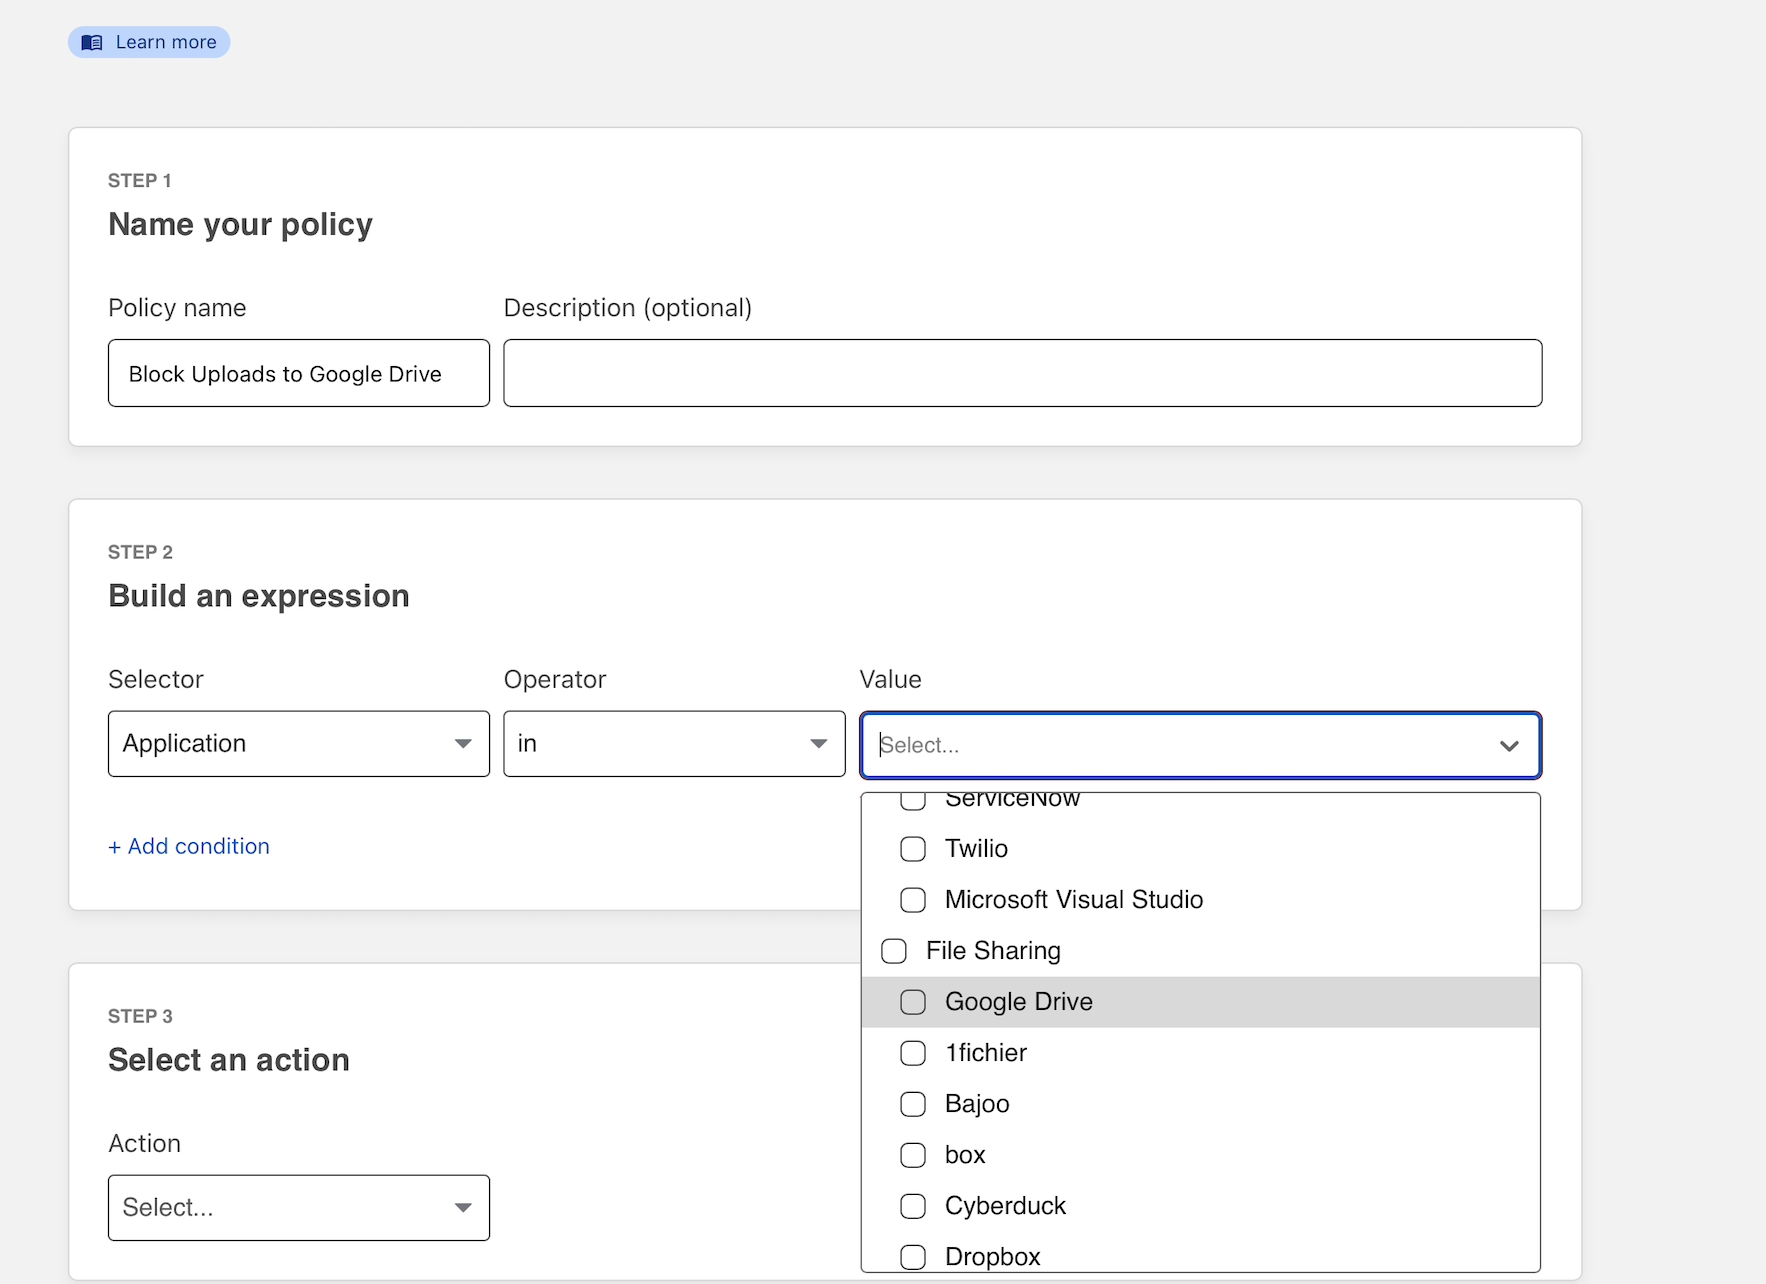
You can build a policy that will block file uploads to Google Drive. Navigate to the Policies page. On the HTTP tab, click Create a policy.
Name the policy and provide an optional description.
Cloudflare curates a constantly-updating list of the hostnames, URLs, and endpoints used by common applications. In this example, “Google Drive” list contains the destinations used by Google Drive.
In the rule builder, select “Application” in the Selector field, “in” in the Operator field, and under “File Sharing” select “Google Drive” in the Value field.
Next, click + Add Condition and choose “Upload Mime Type” and “matches regex”. Under value, input .* - this will match against files of any type being uploaded.
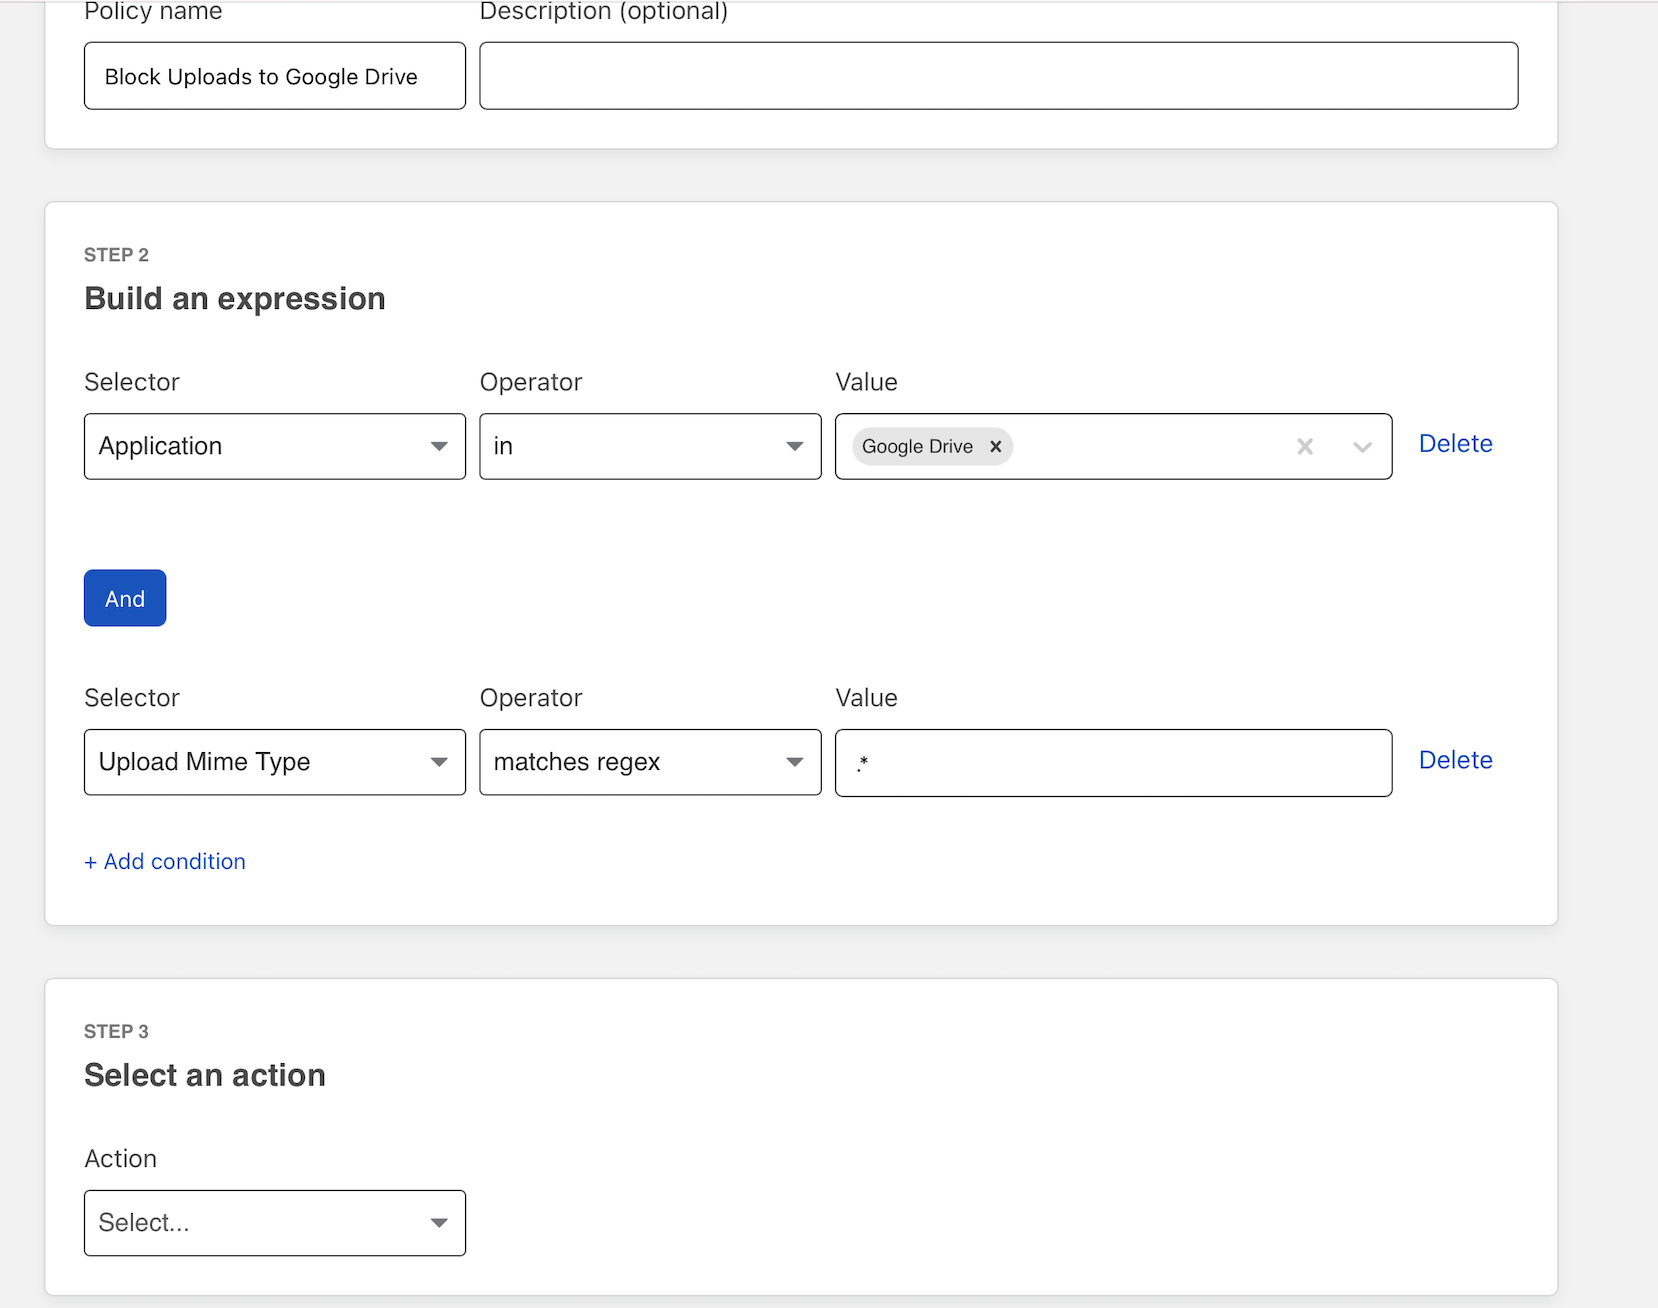
Scroll to Action and choose “Block”. Click Create rule to save the rule.
Exempt some users
You can allow certain users to upload to Google Drive, while blocking all others, by adding a second policy and modifying the order of rule operations in Gateway.
Create a new policy and include the first two values from the previous policy. Add a third condition and input the value of user identity that should be allowed to upload. Select Allow for the action and save the rule.
Next, modify the existing rule order by dragging each rule into the desired order.
Integrate your identity provider
The HTTP filtering policy created will apply to any HTTP requests sent from configured locations or enrolled devices. You can begin to enroll devices by determining which users are allowed to enroll.
Navigate to the Settings section of Zero Trust and select Authentication. Cloudflare Zero Trust will automatically create a “One-time PIN” option which will rely on your user’s emails. You can begin using the one-time PIN option immediately or you can also integrate your corporate identity provider.
Determine which devices can enroll
Next, build a rule to decide which devices can enroll in your account.
Navigate to Settings > Devices > Device enrollment.
Click Manage.
Click Add a rule.
Determine who is allowed to enroll by using criteria including Access groups, groups from your identity provider, email domain, or named users. For example, you can include emails ending in
@cloudflare.comso that any user with a@cloudflare.comaccount may enroll.Click Save.
Your rule will now be visible under the Device enrollment rules list.
Configure the Cloudflare certificate
To inspect traffic, Cloudflare Gateway requires that a certificate be installed on enrolled devices. You can also distribute this certificate through an MDM provider. The example below describes the manual distribution flow.
To download the Cloudflare certificate:
- Follow the link provided in these instructions.
- Find the certificate in Zero Trust, by navigating to Settings > Devices > Certificates.
Enable the Cloudflare proxy
Once the certificate has been installed, you can configure Gateway to inspect HTTP traffic. To do so, navigate to Settings > Network. Toggle Proxy to Enabled. This will tell Cloudflare to begin proxying any traffic from enrolled devices, except the traffic excluded using the split tunnel settings.
Next, enable TLS decryption. This will tell Cloudflare to begin decrypting traffic for inspection from enrolled devices, except the traffic excluded from inspection.
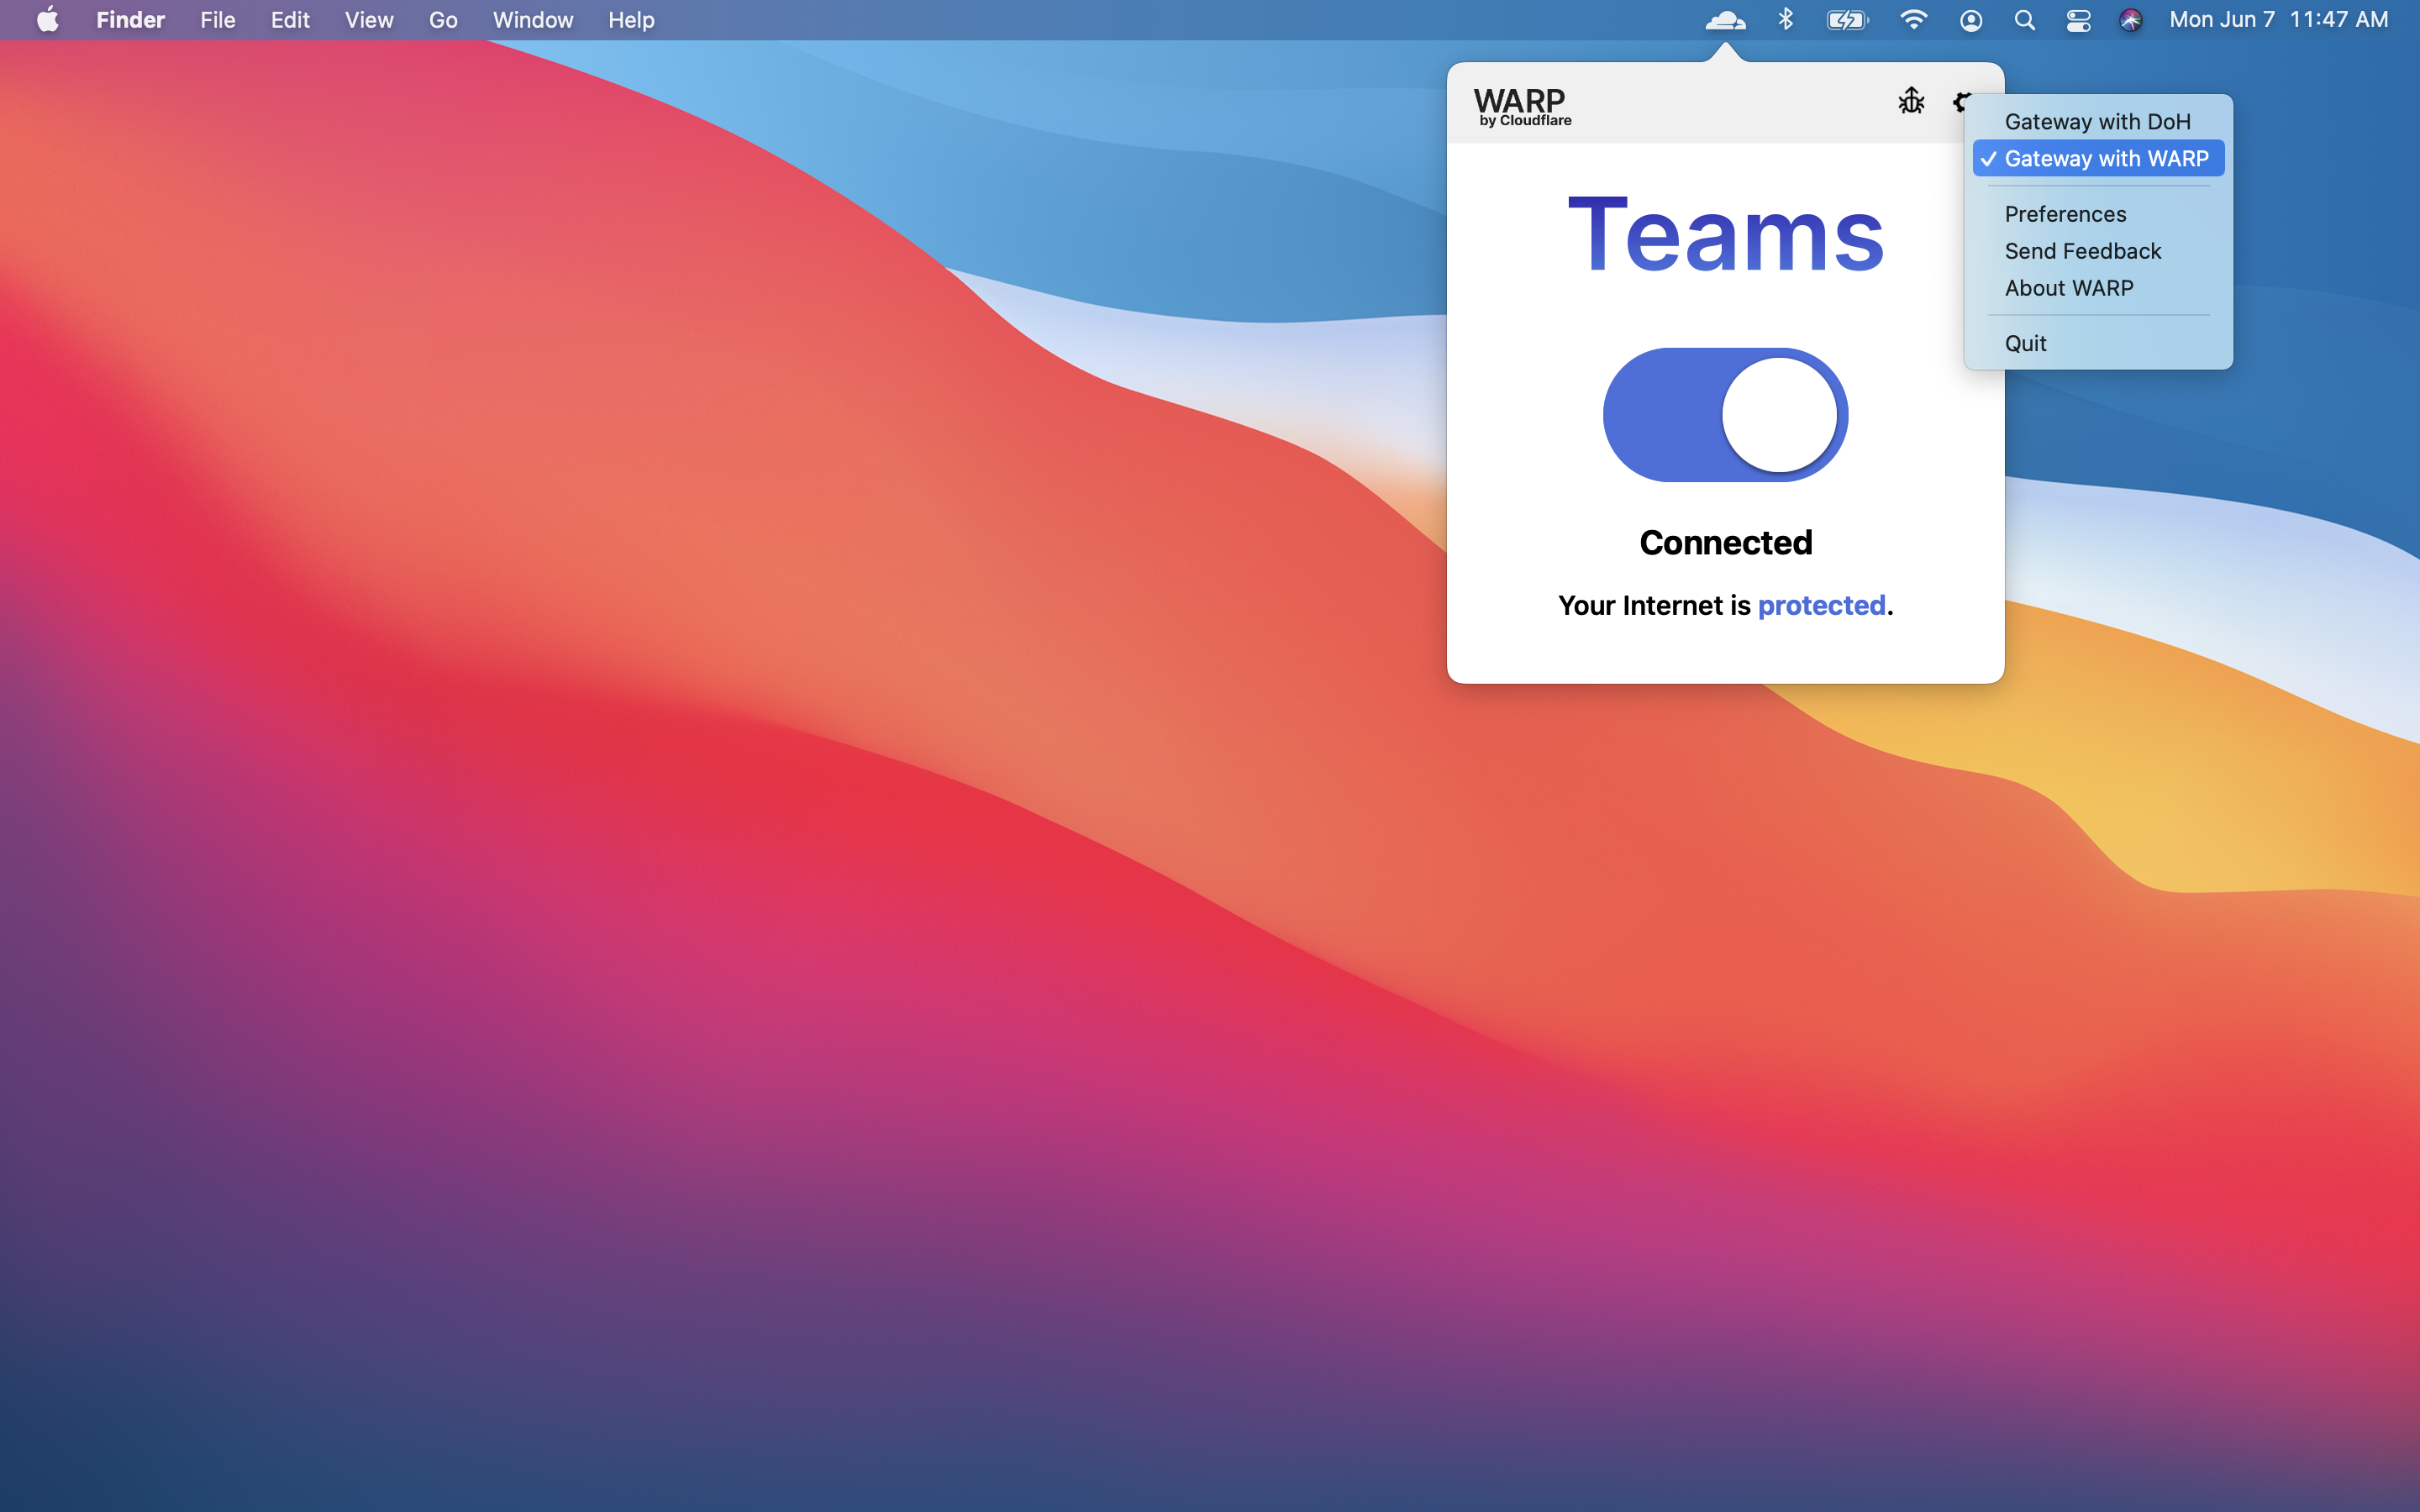
Enroll a device
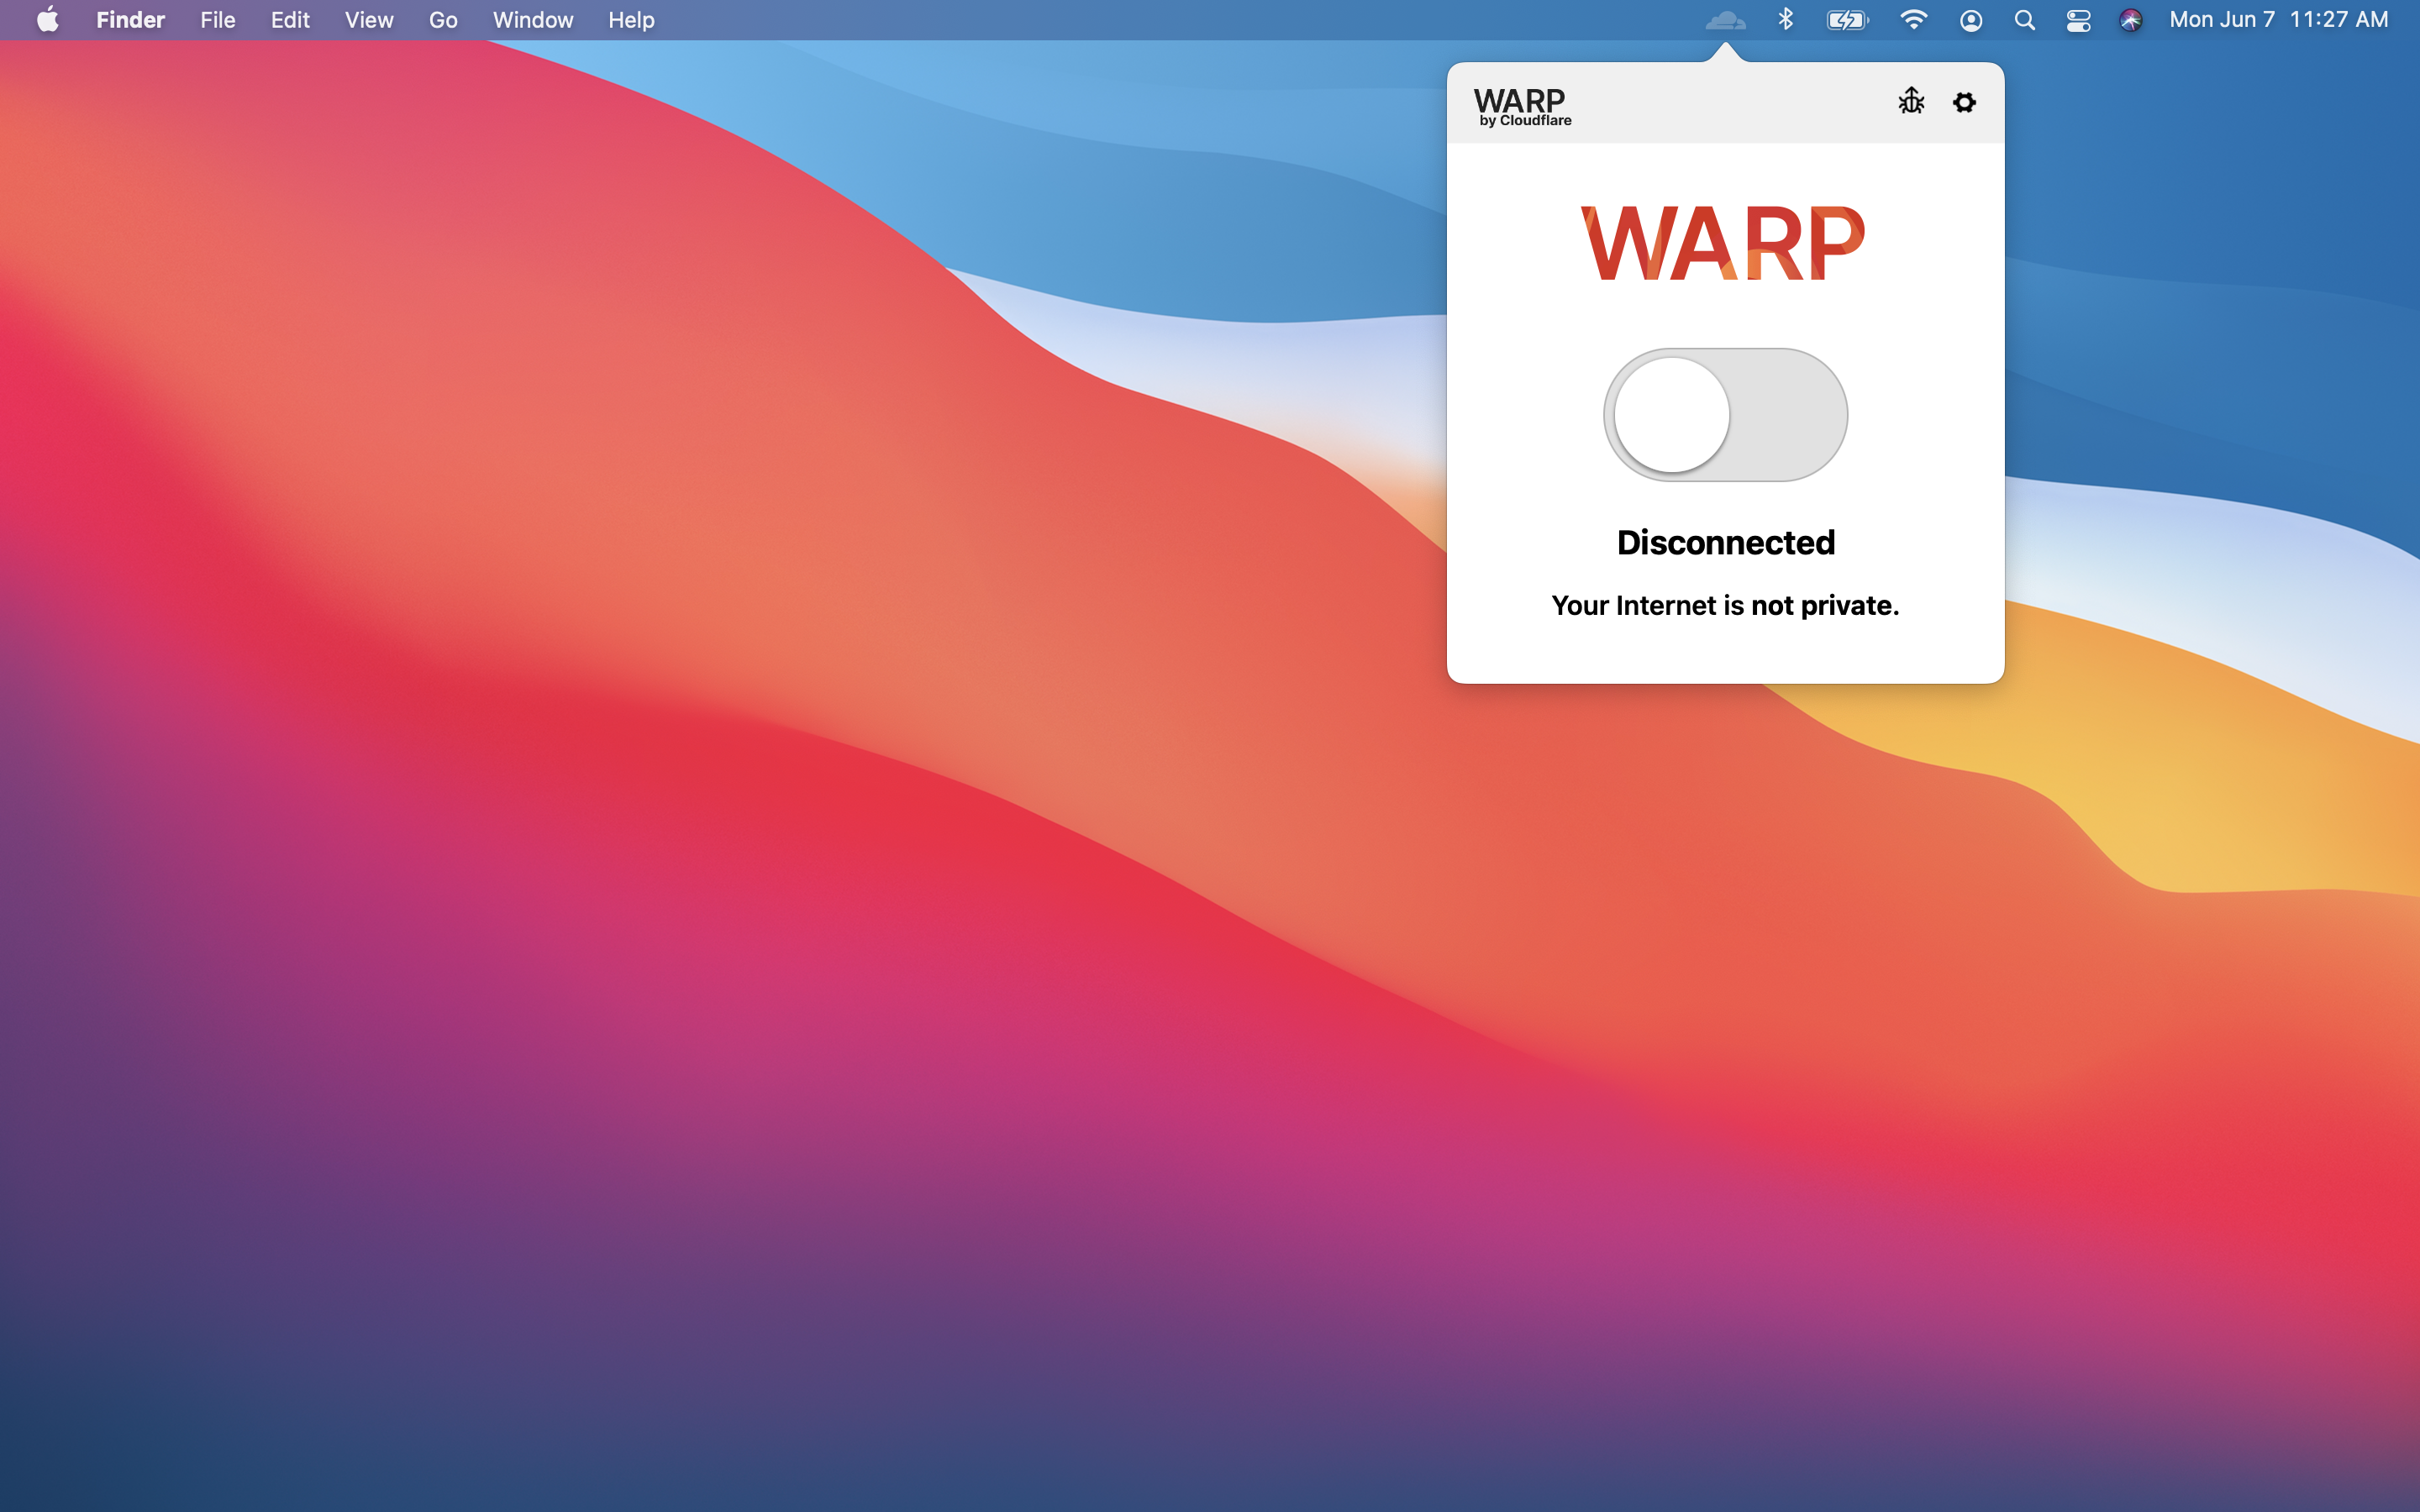
Follow the instructions to install the WARP client depending on your device type. Cloudflare Gateway does not need a special version of the client.
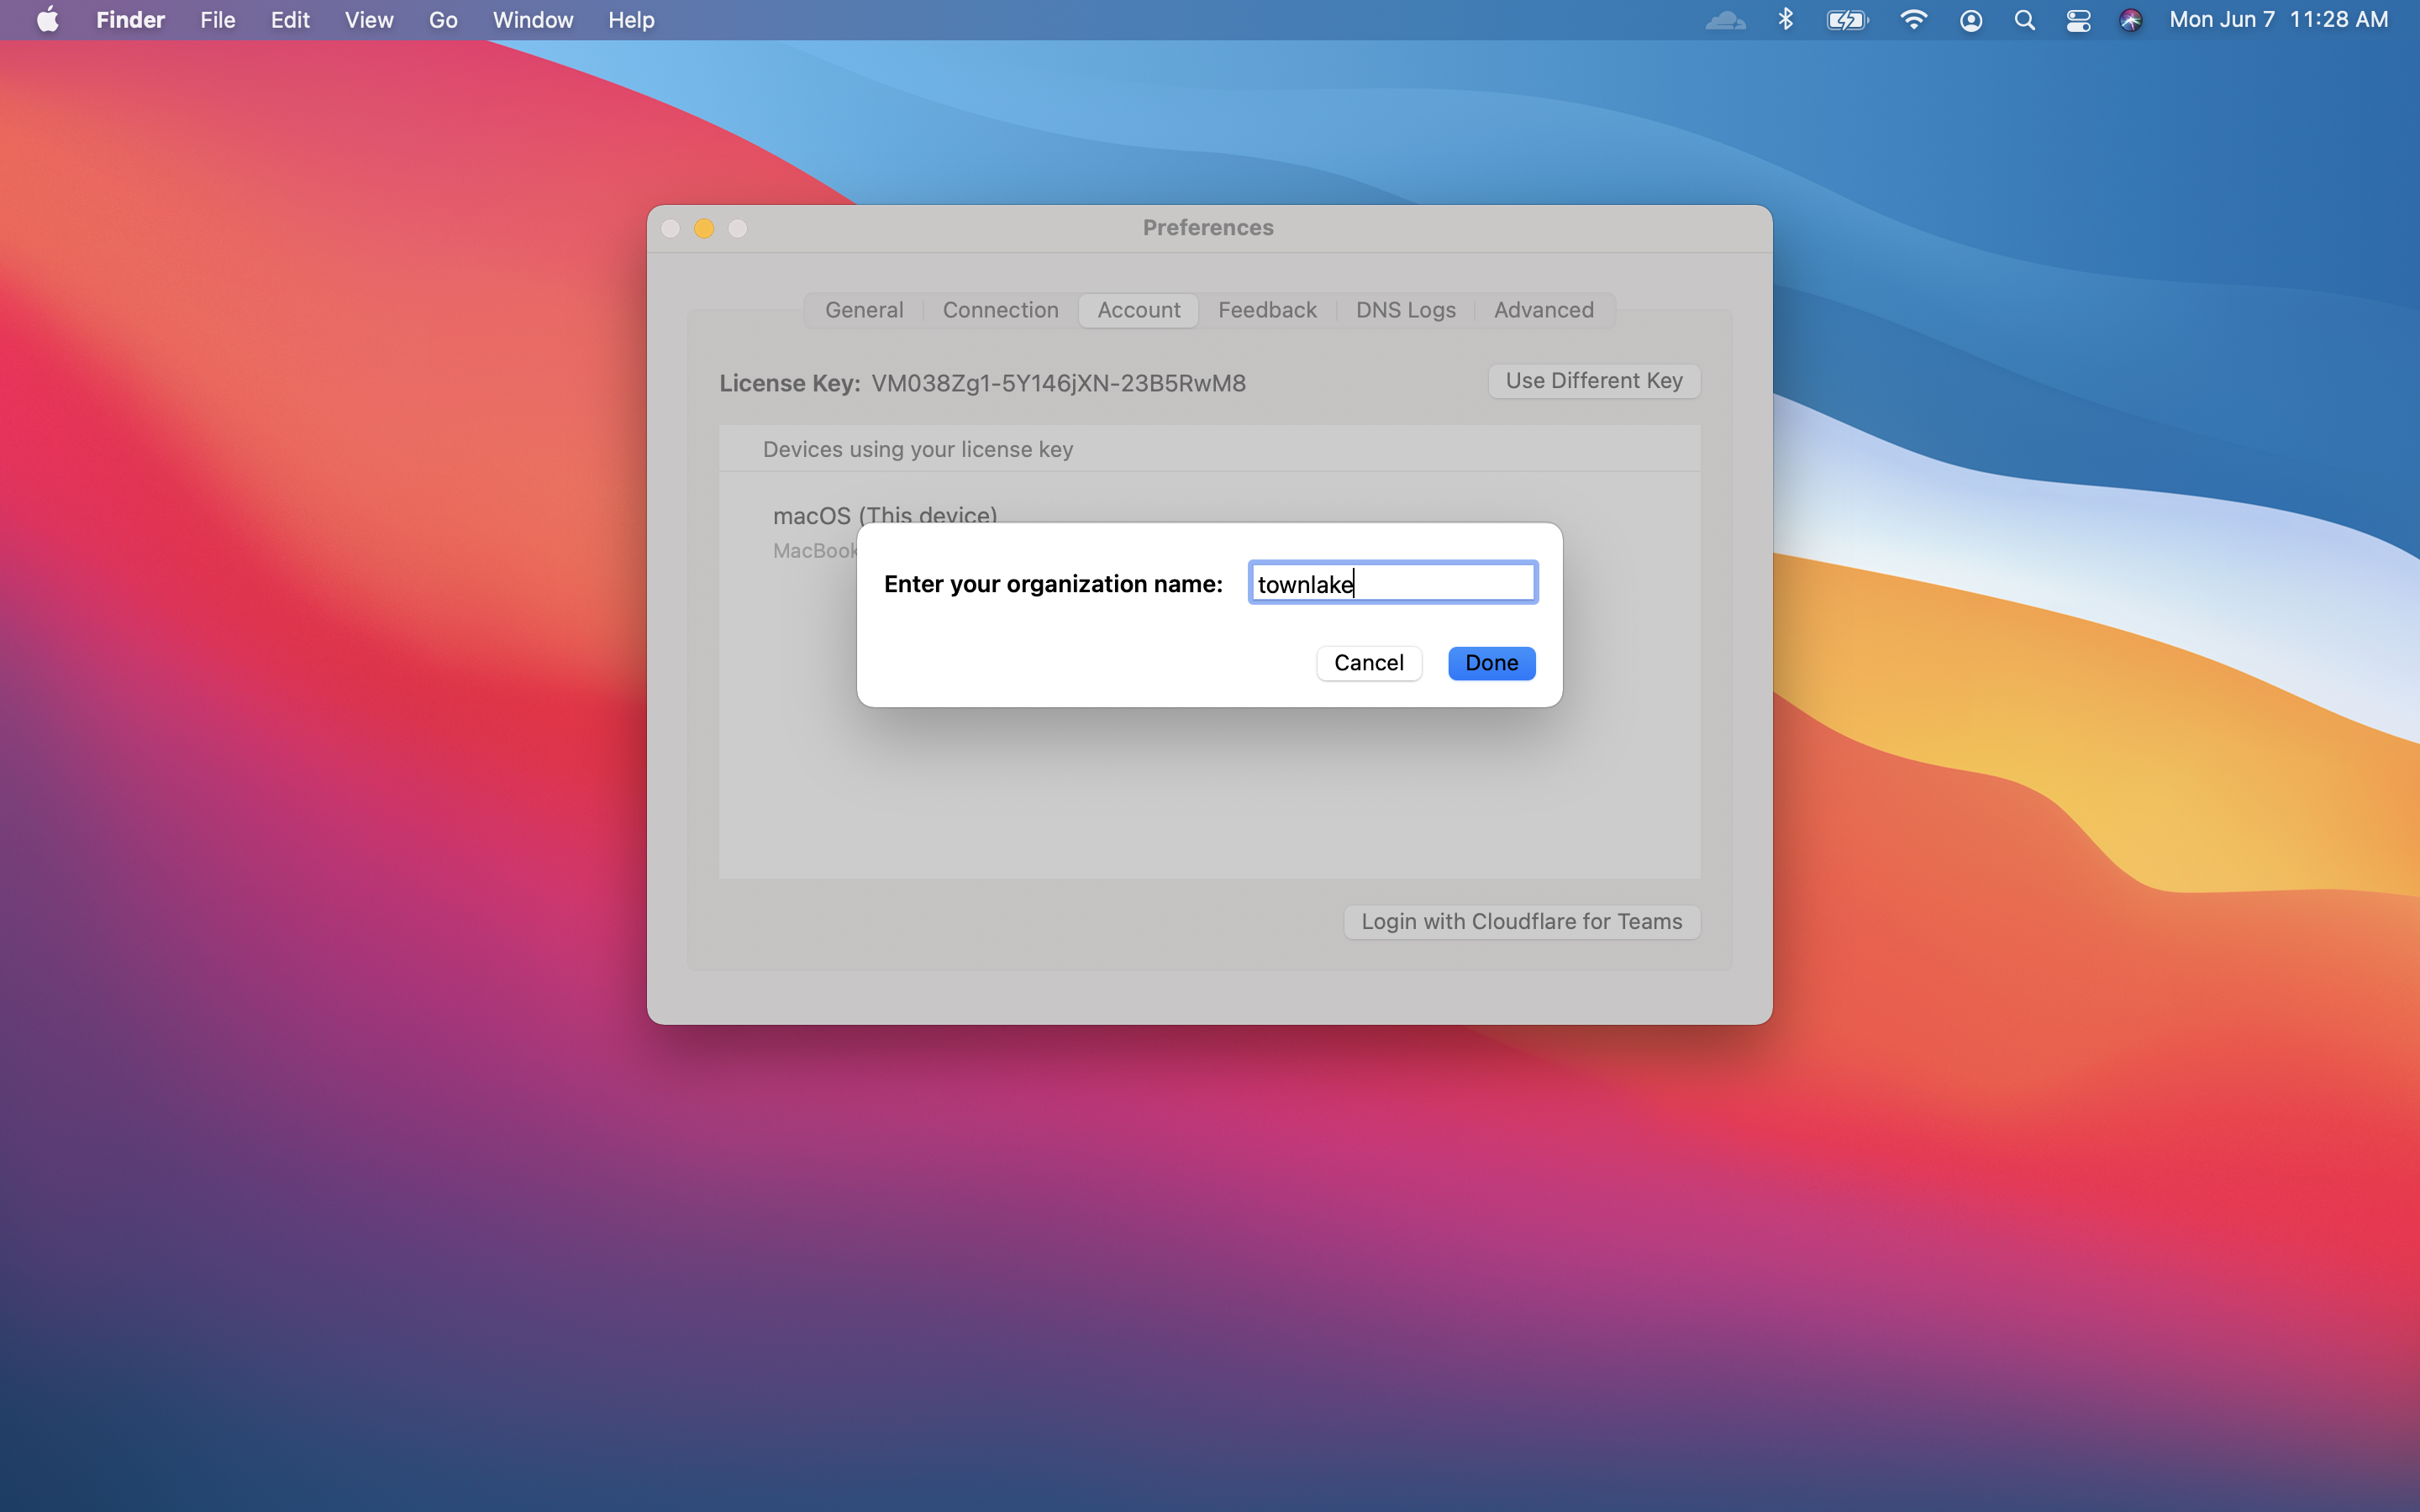
Once the client is installed, click the gear icon.
Under the Account tab, click Login with Cloudflare for Teams.
Input your team name. You can find it in Zero Trust under Settings > General.
The user will be prompted to login with the identity provider configured in Cloudflare Access. Once authenticated, the client will update to Teams mode. You can click the gear to toggle between DNS filtering or full proxy. In this use case, you must toggle to Gateway with WARP. These settings can be configured globally for an organization through a device management platform.
Test policy
You can test the policy by attempting to upload a file to Google Drive. Google Drive should return an error message when blocked.